













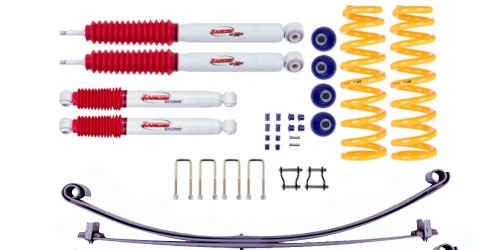
Rancho RS5000X vs RS9000XL: Which Adjustability Level Does Your 4WD Actually Need?
Most 4WD owners shopping for Rancho suspension already know they want an upgrade. The harder question is which one. Walk into any conversation about the RS5000X versus the RS9000XL and you'll quickly hit a wall of jargon about valving, damping rates, and adjustment dials that sounds impressive but doesn't actually tell you what you need to know for Australian touring conditions.
Here's the honest truth: for a lot of drivers, the extra adjustability of the RS9000XL is genuinely valuable. For others, it's a feature they'll dial in once and never touch again. The difference usually comes down to one practical question about how you actually use your 4WD.
In this post, we'll break down exactly how adjustable shocks work, what Rancho's own adjustment framework means in the real world, and where each shock fits across common Australian touring and off-road scenarios. By the end, you'll have a clear, no-guesswork answer about which option suits your setup, your payload habits, and your budget. No overcomplicated theory. Just a straightforward decision you can feel confident about.
How Adjustable Shocks Actually Work (And Why It Matters for 4WDs)
A shock absorber does one job: it controls how quickly your suspension compresses and rebounds when you hit a bump. The resistance it applies during that cycle is called damping force, and adjustability simply means you can change how much of it the shock delivers.
The Rancho shocks in this comparison take two different approaches to that problem.
The RS5000X uses a fixed damping curve set at the factory. It is engineered for a defined load range and terrain type, and that calibration never changes. Fit them and forget them.
The RS9000XL adds a nine-position external adjuster knob. Rotate it toward position 1 and the shock becomes softer and more compliant; rotate toward position 9 and it firms up for heavier loads or rougher terrain. No tools required, and the change is immediate.
Here is why that distinction matters in practice. Add 250 kg of gear, water, and fuel to a GX or Prado and the suspension geometry shifts, the springs compress further, and the dynamics of the whole system change. A fixed-valve shock tuned for an unladen vehicle will feel harsh under that load. A shock tuned for a loaded touring rig will feel vague and wallowy when you strip it back out for the daily commute.
Rancho's own "Choose Your Level of Adjustment" framework captures this cleanly: consistent load, consistent setup. Varying load, varying needs. That single question is the foundation of the decision this article is designed to help you make.
The RS5000X: A Fixed-Valve Upgrade Built for Set-and-Forget Confidence
So where does the RS5000X sit in that framework? Squarely in the "consistent load, no-fuss upgrade" category.
The RS5000X uses a fixed-valve damping circuit, meaning the valving is calibrated at the factory and stays there. It is engineered to outperform standard OEM shocks across a broad range of conditions, not just replicate them. Rancho's product positioning describes the RS5000X as suited to a moderately loaded vehicle across varied terrain. That covers a lot of Australian driving.
Because the valving is set at manufacture, there is nothing to adjust and nothing to forget. No knobs, no risk of leaving it on the wrong setting from last weekend, no pre-trip checklist item. You fit them and drive.
Who does that suit? More drivers than you might expect. A touring rig with a permanent drawer system, full water storage, and a consistent kit load sits in a predictable weight range trip after trip. A tow vehicle running the same caravan at a consistent ball weight rarely needs to retune between hitching up and unhooking. A daily driver that occasionally pulls off onto a fire trail on weekends is another strong match.
Australian fitment coverage is broad. The RS5000X is available for a wide range of popular platforms including Toyota LandCruiser, Prado, Hilux, Ford Ranger, and Isuzu D-Max, among others. Always confirm your specific build before purchasing. If you are unsure where to start, this guide to choosing the right shocks for your 4WD is a useful first stop.
The RS9000XL carries a price premium that reflects its adjustable valving, making the RS5000X the more accessible entry point for drivers stepping up from worn or standard-spec shocks who do not need maximum tunability.
The RS9000XL: What 9-Position Adjustment Actually Gives You on Australian Tracks
Where the RS5000X leaves off, the RS9000XL picks up with something genuinely different: a nine-position external adjuster that physically changes damping force on demand. Per Rancho's general guidance, lower positions are softer and higher positions firmer, though confirm the direction on your specific unit. Reach under the guard or through the wheel arch, rotate the knob, and the change is immediate.
The range is wide enough to matter in practice. In practical terms, think about a loaded 79 Series heading outback. Camping gear, drawers, a rooftop tent, and two full long-range tanks represent a serious payload. For example, many tourers find a higher position (such as 6 or 7) suits corrugated dirt under load, while a lower position (around 3 or 4) softens the ride for unladen urban driving -- though your ideal settings will vary.
The RS9000XL also suits 4WDs that regularly swap between towing and running without a trailer. The shift in dynamics between a loaded tow configuration and an unloaded vehicle is significant enough that a fixed-valve shock ends up as a compromise in both directions simultaneously.
One honest note: the nine positions are not labelled for specific scenarios. Rancho provides general guidance, but finding your preferred settings involves some trial and adjustment on familiar roads. That is a minor learning curve, not a technical barrier.
The RS9000XL is also available in lift heights compatible with various suspension kits. Always confirm part numbers for your specific lift height before ordering, and check vehicle and lift-specific fitment notes to confirm the correct part number for your application.
The 200 kg Payload Rule: When Adjustability Stops Being Optional
So what's the actual trigger point for choosing the RS9000XL over the RS5000X? It comes down to one question: how much does your total payload vary between your heaviest trip and your lightest?
While Rancho does not publish a single official payload threshold, the 200 kg figure represents a practical rule of thumb widely used in the Australian 4WD community -- your own payload calculation is the most reliable guide. A fixed-valve shock will feel like a noticeable compromise in at least one loading state, either too firm when empty or too soft when loaded, once that variation becomes significant.
That 200 kg threshold is easier to hit than most people expect. Two full 60-litre long-range tanks add roughly 100 kg of fuel alone (diesel weighs approximately 0.84 kg/litre, so actual weight varies with temperature and grade). A loaded drawer system with a camp kitchen and recovery gear can contribute approximately 80--120 kg, depending on the specific fit-out. Strip all of that out between trips and the vehicle behaves like a fundamentally different machine.
Below 200 kg of variation, the RS5000X can be valved closely enough to the middle of your load range that neither state feels seriously compromised. It's a genuine sweet spot for drivers whose setup stays relatively consistent trip to trip.
Above that threshold, particularly on corrugated outback roads where sustained rough terrain amplifies every suspension shortcoming, the ability to retune the RS9000XL before departure pays off in reduced driver fatigue and better vehicle control.
The honest self-assessment is the most useful tool here. A Hilux used mostly for commuting with occasional weekends at a predictable load is a textbook RS5000X candidate. A LandCruiser 200 Series that runs loaded for a month on Cape York, then sits empty between trips, points clearly toward the RS9000XL. If you want help mapping this to your specific build, the 4WD vehicle setup guide is a practical starting point.
Matching Rancho Suspension to Australian Terrain and Touring Scenarios
Payload variation tells you which shock to buy. Terrain tells you why that choice plays out the way it does on Australian tracks.
Outback corrugations are a useful starting point. They generate sustained, high-frequency impacts that build heat in the damper fluid faster than almost any other surface, and under-spec shocks fade noticeably over long corrugated stretches. Firmer, controlled damping under a consistent load handles this better, which is why both products perform well here when matched correctly to the vehicle's actual weight.
For desert touring routes like the Simpson, the Strzelecki, or the Gibb River Road, most rigs run a fixed load from start to finish. Fuel, water, and gear go in at the trailhead and come out at the end. In that scenario, the RS5000X's fixed tuning is often entirely adequate; there is genuinely nothing to adjust mid-trip if the load does not change.
Beach driving introduces a different variable. Airing down shifts load dynamics, and softer compliance aids sand traction. RS9000XL owners can drop to a lower position before airing down, a small but worthwhile handling benefit that a fixed-valve unit simply cannot replicate.
On alpine terrain like the Alpine Way or High Country tracks, loaded tourers descending steep technical trails benefit from firmer damping control. The RS9000XL allows a single pre-trip adjustment rather than accepting whatever compromise a fixed valve delivers across both the climb and descent.
Daily driving between trips is where the RS5000X is most likely to frustrate. A shock calibrated for a heavily loaded touring rig can feel punishing over urban speed humps and poor road surfaces when the vehicle is running empty.
For buyers weighing Rancho against other brands, our 4WD and off-road suspension range includes Bilstein, Koni, and Tough Dog, each with a different tuning philosophy to suit different platforms and budgets.
RS5000X vs RS9000XL: Side-by-Side Feature Comparison
Here's a clean side-by-side breakdown of where the two units actually differ.
| Feature | RS5000X | RS9000XL |
|---|---|---|
| Adjustment | Fixed-valve, no user settings | 9 external positions, no tools needed |
| Design intent | Consistent payload, OEM-plus upgrade | Variable loads, touring plus daily use |
| Complexity | Fit and forget | Requires active setting selection |
| Price | Lower entry point | Premium reflects adjustable valving |
| Fitment | Common AU platforms, part numbers vary | Common AU platforms, part numbers vary |
| Warranty | Rancho manufacturer warranty | Rancho manufacturer warranty |
Warranty terms vary by market; confirm current coverage with the supplier at time of purchase.
A few points worth expanding briefly.
Complexity is the honest differentiator. The RS5000X demands nothing from you after fitment. The RS9000XL works best when you engage with it; selecting the right position before a loaded outback run versus an unladen highway drive is a small habit, but it is a habit. Neither unit is difficult to live with, just different in what they ask of you.
On price, the RS9000XL premium is real. Whether it is worth it comes down to how often you would genuinely rotate that adjuster. If the answer is rarely, the RS5000X delivers strong value. Rancho's own Choose Your Level of Adjustment framework is a useful self-check here.
On durability, the RS9000XL adjuster is designed for field use; check Rancho's current product documentation for sealing specifications relevant to outback conditions. Both units carry Rancho's manufacturer warranty.
For fitment, confirm your specific part number via our product listings, as applications vary by vehicle, lift height, and front or rear position.
Which One Is Right for Your 4WD? A Straightforward Decision Guide
With the feature comparison done, the decision really comes down to one question: how much does your load actually vary?
Choose the RS5000X if:
- Your payload stays within roughly 200 kg of itself between trips
- You want a genuine performance upgrade with zero ongoing tuning input
- Your primary use is outback touring or mixed conditions at a consistent setup
Choose the RS9000XL if:
- Your payload swings by more than 200 kg regularly, which is common on dual-cab utes that double as work vehicles
- You alternate between towing and running unladen
- You do meaningful daily driving between tours and want a softer setting for suburban roads
It's worth being clear on one point: this is not a quality decision. Both units are a genuine step up from standard or worn OEM shocks, and both are well-regarded in the Australian 4WD suspension market. The question is purely fit for purpose.
The Bottom Line on Rancho Adjustability for Australian 4WDs
The decision really does come down to one honest question about your load.
The decision is simpler than the spec sheet makes it look. If your 4WD runs a consistent setup, the RS5000X delivers a genuine, capable upgrade over OEM shocks without asking anything of you after fitment. Set it and forget it.
If you're also weighing other brands, Bilstein is worth considering alongside Rancho for buyers weighing different tuning philosophies.
For fitment, check your specific vehicle and lift configuration against our product listings, and get in touch if you need help matching the right unit to your build.
Conclusion
Choosing between the RS5000X and RS9000XL comes down to four honest realities: how variable your payload is, how often you adjust your setup, what terrain you regularly tackle, and whether the performance premium justifies your actual use case.
Browse our Rancho product listings, compare fitment options for your specific vehicle, and reach out to the team if you need help making the final call. The right shock is the one that matches your real-world build.


KONI Heavy Track vs KONI Raid: Which Shock Suits Your Build?
Choosing the wrong shock absorber does not just affect ride quality. It accelerates wear, compromises safety, and costs you money you did not need to spend. For 4WD owners researching koni shocks australia, the decision between the KONI Heavy Track and the KONI Raid is one of the most consequential choices in a suspension build, and it is one that gets made incorrectly more often than it should.
These are not two versions of the same product. They are purpose-built for fundamentally different vehicle roles, and KONI engineered them that way deliberately. Selecting based on brand familiarity alone, rather than how your vehicle actually gets used, is where the problem starts.
This post breaks down exactly what separates these two shocks at a technical level, maps each one to the real-world scenarios they were designed for, and gives you a clear framework to make the right call for your build. Whether you run heavily loaded touring rigs or you are chasing genuine off-road articulation, the answer is in how your vehicle lives its life, not which product sounds more capable on paper.
Why Getting This Choice Wrong Is an Expensive Mistake
The KONI Heavy Track and KONI Raid share a nameplate, a reputation, and a price point around AU$410 per unit (2014 pricing). They do not share a purpose, and fitting the wrong one to your 4WD is a costly way to discover that distinction.
Many buyers searching for KONI Heavy Track shocks assume that any KONI product will outperform OEM dampers, which is true, but only when the model matches the vehicle's role. Each shock is tuned for a fundamentally different application. The consequences of a mismatch run in both directions: a Raid shock fitted to a slow-touring rig produces unnecessarily firm, poorly matched damping that degrades ride quality and places undue stress on the chassis. A Heavy Track fitted to a vehicle running high-speed corrugated outback tracks lacks the construction to manage sustained impact forces and heat loading over distance.
At roughly AU$410 per unit (2014 pricing), a full set represents a significant investment. Unlike budget shock absorbers where a wrong selection is a minor loss, an incorrect KONI purchase means spending premium money to compromise your suspension performance rather than improve it. That cost is avoidable with upfront research.
Two Shocks, Two Jobs: What KONI Actually Built Each One For
The distinction starts with engineering intent, not marketing language.
The KONI Heavy Track is built for 4WDs and SUVs operating across mixed terrain: sealed highways, gravel station tracks, corrugated outback roads, and everything between. Its travel is tuned to maintain wheel contact and comfort across articulation demands without sacrificing on-road behaviour. KONI's own documentation positions it squarely in the expedition and touring category, describing it as an "all road" damper optimised for on-road and off-road challenges equally.
The KONI RAID was developed from rally-raid competition heritage, with Dakar Rally and similar high-speed rough terrain events as its design brief. Where the Heavy Track prioritises versatility, the RAID is engineered to absorb sustained high-frequency impacts at speed, where heat buildup and impact loading are the primary failure risks, not articulation depth. It is a specialist product with a narrower intended use case.
That distinction maps directly to real-world Australian 4WD roles. For most Australian 4WD owners, that role sits firmly in Heavy Track territory.
Both products share KONI's rebuildable architecture, which extends service life indefinitely and requires no vehicle modifications on installation. That commonality makes them easy to confuse. For guidance on how to choose the right shocks for your 4WD, the internal tuning divergence between these two models is exactly where that decision starts.
Technical Specifications: Where the Differences Actually Live
Those diverging design philosophies are built into the hardware itself, and the numbers tell the story clearly.
The KONI RAID uses a full hydraulic twin-tube construction with a large internal oil volume, engineered specifically to dissipate heat during sustained high-speed running. On corrugated outback tracks, thermal fade is a genuine failure risk for shocks pushed hard over distance; the RAID's oil volume is a direct engineering response to that problem. The 2.5mm outer tube wall also provides meaningful protection against rock strikes in technical terrain.
The RAID's confirmed dimensions: 70mm bore body, 42mm piston, 18mm hard chromed rod. These aren't cosmetic specs; they reflect a shock built to absorb high-frequency, repetitive impacts at pace.
The RAID runs an extra 40mm in length compared to the Heavy Track, providing additional travel for high-speed terrain absorption. The Heavy Track's tuning, by contrast, prioritises articulation capability at moderate speeds, where wheel contact and composure across broken ground matter more than maximum travel length.
Rebound adjustability, covered in detail in the section below, is shared across both platforms.
On architecture, KONI's full hydraulic twin-tube system carries more oil volume than a conventional monotube design. Buyers considering options from Bilstein should compare specifications directly for their intended application.
Matching Each Shock to Real-World 4WD Scenarios
Those specs translate directly into practical decisions. Here is how each scenario maps to the correct shock.
Loaded touring at highway and moderate gravel speeds is the most common Australian 4WD use case, and the Heavy Track is the right tool. It manages corrugations, handles the added weight of a fully loaded rig, and delivers composed damping across mixed surfaces without the punishing tune of a rally-raid shock.
Expedition overlanding over extended distances sits in the same camp. A 23,000 km Australian field trial on a heavily loaded TD5 Defender 90 confirmed the Heavy Track's durability under genuine expedition conditions. If your build involves long hauls with a laden vehicle, this is the shock with real-world evidence behind it. Drivers planning that kind of build should also review options in the high-end off-road lift kit category for serious off-road and expedition use to ensure the full suspension system matches the shock choice.
High-speed outback track running, where corrugations are hit at pace and damper heat is a genuine concern, is where the RAID earns its place. Its large oil volume and twin-tube architecture are built specifically to manage heat load under sustained high-speed impact. This is its intended environment.
Technical slow-speed off-road and rock crawling favours the Heavy Track. Its articulation-focused tuning maintains wheel contact through technical terrain far better than the RAID's stiffer rally-raid setup.
Rally-raid and competitive off-road events are the RAID's primary brief. Sustained high-speed rough terrain is exactly what it was engineered for.
Daily driving with occasional weekend off-road use points back to the Heavy Track. The RAID's tuning is mismatched to standard mixed-use conditions and will produce unnecessary harshness without delivering any performance benefit.
How Rebound Adjustment Works on KONI Raid Shocks in the Real World
Both shocks share KONI's continuously adjustable rebound, but dialling it in correctly for your build requires understanding what the adjustment actually does.
Real-world data makes the adjustment requirement concrete. Field testing on a 3-tonne loaded Defender fitted with KONI Raid shocks found the front units performed well at factory settings. The rears were a different story. With heavy-duty springs and full touring payload, the rear shocks required 2 to 3 half-turns firmer adjustment before the bounce was resolved. That gap between front and rear behaviour is typical when spring rates and loaded weight diverge from a standard configuration.
This is not a product deficiency. The need to dial in rebound settings is precisely what separates adjustable KONI shocks from fixed-rate alternatives. Buyers fitting RAID shocks to vehicles with non-standard springs or significant payload should plan for a setup phase, not just a bolt-on installation. Skipping it leaves performance on the table.
RAID shocks also incorporate bump stops that protect against harsh bottom-out at the limits of compression travel, complementing the rebound system during high-speed impacts.
The same principle applies to Heavy Track users. Adding touring weight mid-trip? Firming up rebound damping to match takes only minutes with the correct spanner. Both platforms reward the brief effort with a measurably better-controlled ride.
These Shocks Are Not Interchangeable: A Direct Warning
Adjustability is only useful when the right shock is in the vehicle to begin with. No amount of rebound tuning corrects a fundamental mismatch between shock design and vehicle role.
Despite sharing a nameplate, they are not substitutes for each other.
Fitting RAID shocks to a general touring rig produces a ride that is excessively firm at low to moderate speeds. The rally-raid tuning that makes the RAID effective at pace across broken terrain becomes a liability on corrugated gravel at touring speeds. The chassis and suspension absorb stress the RAID was never designed to generate in that context, and the performance advantage the shock is engineered to deliver simply does not exist outside its intended use case.
The reverse carries its own consequences. Fitting Heavy Track shocks to a high-speed outback application means the damper's oil volume and thermal design are calibrated for mixed-terrain use, not sustained high-speed heat loading, a mismatch the shock's architecture was not built to absorb.
This is not a question of one shock being superior. Each is correctly engineered for a defined role. The engineering that makes the RAID exceptional at speed makes it wrong for touring, and vice versa.
Buyers searching for KONI shocks in Australia should approach this as a technical decision, not a brand exercise. Our suspension and 4WD build guides cover fitment considerations in detail. The wrong model fitted to the wrong vehicle is money spent to actively degrade performance.
How to Choose: A Practical Decision Framework for 4WD Buyers
Once you have confirmed this is a genuine technical decision and not a brand preference call, the next step is applying a short set of questions to land on the correct model.
What is your vehicle's dominant role? Touring, overlanding, expedition driving, or daily use with occasional off-road capability all point clearly to the KONI Heavy Track. This is the correct starting point for the vast majority of Australian 4WD owners.
What speeds do you regularly run on rough terrain? If your trips involve sustained high-speed corrugated running, think the Gibb River Road at pace or competitive outback events, the balance shifts toward the RAID. Its large oil volume and twin-tube construction are engineered specifically for heat management under that kind of sustained impact loading.
How heavily is your vehicle loaded? Both shocks handle loaded rigs, but the Heavy Track's expedition tuning suits the slow-to-moderate speed load-carrying typical of Australian touring. The RAID's adjustable rebound allows tuning for payload, but its baseline calibration assumes high-speed running.
Does your platform have confirmed fitment? Not every KONI model is available for every vehicle. Check compatibility for your specific platform, whether that is a Defender, Patrol, GU, Prado, or 79 Series, before purchasing. You can browse KONI shocks across popular Australian 4WD platforms to confirm availability before committing.
Are you running aftermarket springs or a lift kit? Factor in whether your spring rate aligns with the shock's tuning. KONI's adjustable rebound narrows mismatches, but the base model still needs to suit your vehicle's role first.
If these questions still leave uncertainty, default to the Heavy Track. It is the broader-application product with documented performance across Australian expedition conditions.
The Bottom Line: Let Your Vehicle's Role Make the Decision
Once you have worked through the decision framework, the answer is usually clear.
The KONI Heavy Track is the right shock for expedition overlanders, loaded tourers, and mixed-terrain drivers. It delivers articulation capability and consistent performance across varied conditions at moderate speeds. The KONI RAID is the right shock for high-speed outback runners and rally-raid participants who need sustained impact performance and superior heat management over maximum travel.
The difference between them is not quality; it is engineering purpose. Fitting the wrong model produces a rig that underperforms precisely where it matters, whether that is excessive harshness on a loaded touring build or thermal stress on a hard-driven outback track.
Browse the KONI range online or contact the team at Suspension Megastore directly for fitment confirmation before purchasing.
Conclusion
Choosing between KONI Heavy Track and KONI Raid comes down to four things: your vehicle's load, your typical terrain, your average speed, and how hard you push between services.
You have now covered the technical differences, real-world scenarios, and a clear decision framework. The hard work is done.
Confirm fitment and browse the full KONI range at Suspension Megastore. Spec your build with the shock that was actually engineered for the job you are asking it to do. Your rig deserves nothing less.
When to Replace Your 4WD Shock Absorbers: The Signs Most Owners Miss
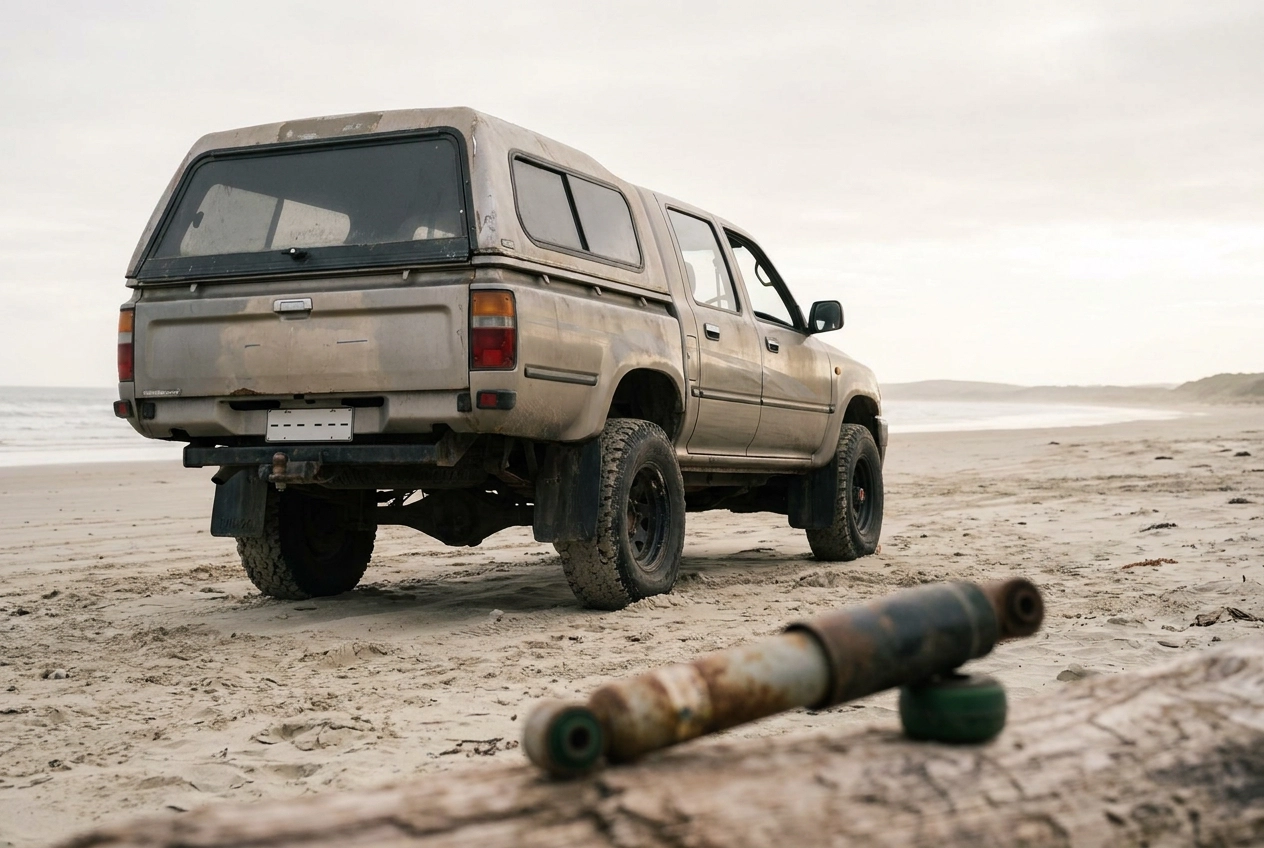
Most 4WD owners know the obvious signs of a dead shock absorber: oil streaking down the body, a visibly collapsed unit, or a ride that feels like the suspension has given up entirely. The problem is that shocks rarely fail that dramatically. They degrade gradually, week by week, kilometre by kilometre, until the vehicle you are driving feels completely normal to you despite performing nowhere near where it should.
That slow decline is exactly what makes worn dampers one of the most overlooked areas of 4WD maintenance. Your stopping distances have crept up. Your tyres are developing an unusual wear pattern. The truck wallows through corrugations in a way it never used to. Each symptom on its own is easy to dismiss. Together, they point to suspension components that are well past their useful life.
This guide moves past the obvious oil-leak diagnosis and walks you through the subtle, easy-to-miss warning signs that experienced operators recognise long before a shock fails visibly. From nose dive under braking to cupped tyre wear, you will learn how to read your vehicle, what to inspect before any off-road trip, and how to make a smart replacement decision before the problem puts you in danger.
Why Gradual Shock Failure Catches 4WD Owners Off Guard
Most shock absorbers don't fail overnight. They degrade across tens of thousands of kilometres, losing damping capacity so gradually that owners adapt without registering it.
The human brain recalibrates to subtle handling shifts. A vehicle that wallows slightly more than it did six months ago still feels familiar, so the driver adjusts unconsciously, slowing on corrugations or gripping the wheel tighter through corners. The degradation only becomes obvious when the vehicle faces something unfamiliar: a rough outback track, a sudden emergency stop, or a loaded run down a dirt descent.
4WD vehicles face compounding wear factors that passenger vehicles don't. Regular heavy loads, towing, corrugated dirt roads, and water crossings all accelerate damper wear well beyond standard service timelines. A shock that comfortably serves a lightly used commuter may show meaningful degradation far earlier on a working touring rig subjected to regular loads, corrugations, and water crossings.
A significantly degraded damper can still feel acceptable on smooth sealed roads, masking performance loss that only reveals itself on technical terrain or under emergency braking. Understanding how to choose the right shocks for your 4WD starts with accepting that shock failure is a spectrum, not a switch. Proactive 4WD maintenance depends on that distinction.
Nose Dive Under Braking: A Safety Warning You Cannot Afford to Ignore
That spectrum of gradual failure has a sharp edge, and braking is where you first feel it cut.
Nose dive happens when worn front shocks can no longer manage the forward weight transfer during deceleration. Instead of the vehicle stopping level, the nose pitches toward the ground as inertia loads the front axle and the dampers lack the resistance to control it. The direct consequence is extended stopping distance, a risk that becomes critical on loose gravel or corrugated dirt where traction is already compromised.
The field test is straightforward. On a safe, quiet road, brake firmly from a moderate speed and watch the nose. A healthy shock set controls the pitch with minimal forward dip. Pronounced nose dive means the front dampers are no longer doing their job.
Load amplifies the problem significantly. A 4WD packed with touring gear, or towing a camper trailer, carries substantially more inertial force into every braking event. Shocks that feel marginal on an empty vehicle can feel genuinely unsafe under touring weight.
The frustrating reality is that nose dive is frequently misdiagnosed. Owners attribute it to low tyre pressure or worn brake pads, adjust those, and notice little improvement. If the nose still dips hard under braking after confirming correct tyre pressures and serviceable pads, the front shocks are the next variable to eliminate.
Wallowing on Corrugations: The 4WD-Specific Red Flag
Corrugation wallowing is where worn shocks expose themselves in territory only 4WD owners encounter.
Wallowing is the rhythmic rocking and floating sensation on washboard dirt roads, where the vehicle loses composure and begins moving as though the road is controlling it rather than the driver. Healthy shocks damp each corrugation's oscillation before the next arrives. Worn shocks allow the suspension to resonate at the corrugation frequency, each bump compounding the last until the vehicle is rolling and pitching with minimal steering precision or traction.
The speed dimension makes this genuinely dangerous. A wallow that feels manageable at lower outback cruising speeds can escalate into a loss-of-control event at higher speeds, well within the range many drivers hold on outback tracks. A loaded touring rig amplifies the problem; the extra mass of drawers, water, and gear increases the energy each corrugation delivers, and degraded dampers cannot dissipate it fast enough.
The diagnostic test is comparison, not appearance. If your vehicle handles a corrugated track noticeably worse than it once did, that change in composure is a reliable signal that a 4WD suspension check is overdue, regardless of whether the shock bodies look intact externally.
Excessive Body Roll Through Corners and Lane Changes
Corrugations expose worn shocks through rhythmic wallowing; sealed roads reveal them through body roll.
Shock absorbers resist the lateral weight transfer that occurs during cornering. When damping degrades, that resistance weakens and the vehicle leans progressively further through bends, feeling top-heavy and unsettled mid-corner.
Lifted 4WDs are especially vulnerable. Raising the centre of gravity amplifies any damping loss, meaning degraded shocks produce noticeably worse body roll than the same wear would cause in a standard-height vehicle.
The diagnostic test is simple. Execute a quick lane change at highway speed or observe the vehicle through a motorway on-ramp. If the body rocks after the input or sways through the bend, that is progressive damper failure, not a chassis or tyre issue.
Off-road, body roll becomes a safety concern. On off-camber tracks the vehicle must resist lateral lean without flat road geometry to help. Worn shocks in this situation increase rollover risk meaningfully.
The subtler danger is driver adaptation. Most owners unconsciously slow down and take bends more cautiously as roll worsens. The vehicle is dictating safe speed. The driver is not choosing it.
Cupped and Scalloped Tyre Wear: Reading the Tread Pattern Diagnosis
While body roll reflects how a vehicle moves, tyre wear tells the story of what has already happened and is often the clearest early evidence of shock failure.
Cupping (also called scalloping) appears as alternating high and low spots around the tread circumference. A worn shock allows the wheel to bounce and skip rather than maintain continuous road contact, wearing the tread unevenly. Tyre cupping is directly linked to worn suspension components that can no longer keep the wheel planted.
The diagnostic method is tactile. Run your hand around the full tread circumference. A tyre backed by functional shocks feels uniformly smooth; cupping produces a distinctive wavy, irregular texture that is immediately recognisable once you know what to feel for.
Critically, cupping can appear without any obvious external damage to the shock body, making it one of the most valuable early indicators available.
The practical trap: cupping introduces steering wheel vibration and floor resonance at highway speeds, so owners replace the tyre without addressing the shock. The new tyre cups rapidly for the same reason.
Rear tyre cupping specifically points to rear shock degradation, a commonly missed issue in touring 4WDs carrying drawer systems, water tanks, and rooftop tents.
Excessive Bouncing After Bumps and the Bounce Test Explained
Tyre cupping tells you the wheel is losing road contact. Excessive post-bump bouncing tells you why.
A healthy shock absorber damps the rebound after suspension compression, returning the wheel to its resting position in one controlled movement. Worn shocks allow the suspension to oscillate before settling, meaning the tyre is repeatedly lifting off the surface instead of tracking it.
The bounce test requires no tools and no workshop. Push down firmly on a bonnet corner or tub corner, then release. A single controlled return to ride height is the target. If the corner bounces and continues to oscillate before settling, the damper is no longer controlling the wheel effectively. Check all four corners individually, as wear is rarely uniform.
This makes it one of the most practical 4WD suspension check methods available, including at a remote campsite before committing to a technical track. Rancho Shocks are a popular choice for owners who have run this test and identified rear damper weakness on touring rigs.
On rough terrain, the consequence compounds. Each successive bump arrives before the previous oscillation has settled, producing the unmistakable pogo-stick sensation that signals the shocks have lost meaningful control.
The test is most revealing at the rear of a loaded touring 4WD. Added weight from drawers, water, and camp gear masks early damping loss on smooth roads, but the bounce test exposes the underlying weakness regardless of surface conditions.
How Payload, Towing, and Lift Kits Accelerate Shock Wear
The bounce test reveals what smooth roads conceal. But if your 4WD is consistently loaded, towing, or running a lift kit, worn shocks may arrive well before the standard service timeline suggests.
Payload is the first accelerant. A touring setup with drawer systems, a rooftop tent, and full water and fuel loads pushes shocks beyond manufacturer baseline assumptions, compressing service life compared to a lightly used vehicle.
Towing compounds the problem at the rear axle specifically. A camper trailer or caravan multiplies dynamic forces through rear suspension during braking, acceleration, and road impacts, degrading shocks faster than identical units on a vehicle that never tows.
Lift kits introduce a geometry variable that is often overlooked. Altering ride height changes shock operating angles and directly affects how damper internals wear. This is why Tough Dog, Bilstein, Rancho, and Koni engineer 4WD-specific shocks for lifted configurations. If you are considering a high-performance lift kit for serious off-road use, matching the shock specification to your actual ride height is essential.
As a practical guide: highway-only 4WDs will typically last significantly longer before shocks need attention than regularly loaded touring and towing vehicles, where degradation can arrive well ahead of any standard service timeline. On lifted vehicles, side-to-side instability on technical tracks may appear before familiar on-road symptoms.
Visual Inspection: Oil Leaks, Corrosion, and Physical Damage
Performance signs identify the problem; a hands-on visual inspection confirms it. Both are necessary.
Oil weeping is the first thing to check. A wet, dusty residue tracking down the shock body from the rod seal indicates the internal seal is failing. This is distinct from a catastrophic leak; a weeping shock may still provide partial damping, but replacement is overdue. A shock in the early stages of failure may appear dry externally, which is why visual inspection alone is never sufficient, performance checks must accompany it.
Physical damage to the shock body and shaft is the next priority. Inspect the lower shaft and body for dents, corrosion pitting, and impact scoring. Rocky terrain regularly delivers direct strikes to shock bodies; a bent shaft or pitted rod surface creates a direct leak path and compromises seal integrity from that point forward.
Mounts and bushings at both attachment points deserve equal attention. Worn bushings introduce play into the system, producing knocking sounds on rough terrain and reducing the precision of wheel control, even when the damper itself still functions. Any detectable movement at the mount under hand pressure is a replacement trigger.
A complete 4WD suspension inspection combines these physical checks with the performance observations covered throughout this guide. Neither the visual nor the performance picture is complete without the other.
Pre-Trip Diagnostic Checklist: What to Check Before You Leave the Bitumen
Run these four checks with the vehicle packed as it will be for the trip, not empty. Load shifts the shock's operating point, and a lightly loaded test will miss degradation that only shows under touring weight.
- Bounce test (all four corners). Push down on each corner and release; a single controlled return to ride height is the target (see Bounce Test section for full protocol).
- Tyre inspection. Run your hand around the full circumference of each tyre and feel for irregular high-and-low spots indicating cupping (see Cupped Tyre Wear section for full protocol).
- Braking test. On a quiet road, brake firmly from a moderate road speed. If the nose pitches hard toward the ground rather than the vehicle stopping level, treat this as a go/no-go result for any remote trip where emergency braking on loose surfaces may be required.
- Visual check. Inspect shock bodies, mounts, and bushings for oil weeping, corrosion, and play at attachment points (see Visual Inspection section for full protocol).
If any of these checks raises concern, treat it as a reason to inspect further before you leave. The more checks that flag an issue, the stronger the case for replacement. Replacing worn 4WD suspension parts for off-road performance before a remote trip is consistently cheaper and safer than a recovery.
Choosing Replacement Shocks: Matching the Upgrade to Your 4WD Use Case
Once the pre-trip checklist confirms replacement is due, the next decision matters as much as the timing: choosing the right shock for the job.
Stock replacements restore factory performance but are the wrong choice for any 4WD that has been lifted, regularly carries heavy touring loads, or spends serious time off-road. These use cases need purpose-built 4WD suspension components designed for the demands actually placed on them.
A quick guide to matching the shock to the use case:
- Tough Dog suits Australian touring conditions well, with configurations suited to touring conditions. If your vehicle alternates between a fully laden touring setup and lighter daily driving, adjustability pays dividends.
- Bilstein's design is built for high-demand off-road use, making it a strong choice for owners covering sustained rough terrain.
- Rancho shocks suit 4WDs moving between highway kilometres and technical off-road sections on the same trip, where that flexibility is practically useful rather than just a feature on paper.
- Koni shocks are well suited to owners whose pack weight varies significantly between trips.
One rule applies regardless of brand: always match the shock specification to the vehicle's current ride height and intended load. A shock valved for a standard-height vehicle will not damp correctly on a lifted platform, undermining both performance and safety.
For more guidance, explore the suspension buying guides and technical articles available on site.
The Cost of Waiting Versus the Value of Acting Early
Shock degradation is gradual, and the most dangerous signs show up in performance long before anything fails visibly. By the time you see a weeping seal, your shocks may have been underperforming for tens of thousands of kilometres.
The five warning signs covered in this guide, and the pre-trip checks that catch them, take minutes to run and cost nothing.
The cost calculation is straightforward. A set of replacement shocks is a known, manageable expense. Premature tyre wear, extended braking distances, and a recovery from a remote track are not. Worn 4WD suspension components compound quietly until they don't.
If any of these signs are present in your vehicle, inspect your shocks now. Browse Tough Dog, Bilstein, Rancho, and Koni options matched to your vehicle's current setup and use case before your next trip out.
Conclusion
Shock absorbers degrade silently, and the warning signs covered throughout this guide appear in performance long before anything fails visibly.
Your suspension is the foundation of everything your 4WD is built to do. Do not wait for a close call to confirm what the symptoms are already telling you. Inspect your shocks today, run the checklist before your next trip, and choose replacements that match how you actually use your vehicle.
Bilstein B6 vs B8 Shocks for 4WD: Which Spec Suits Your Build?
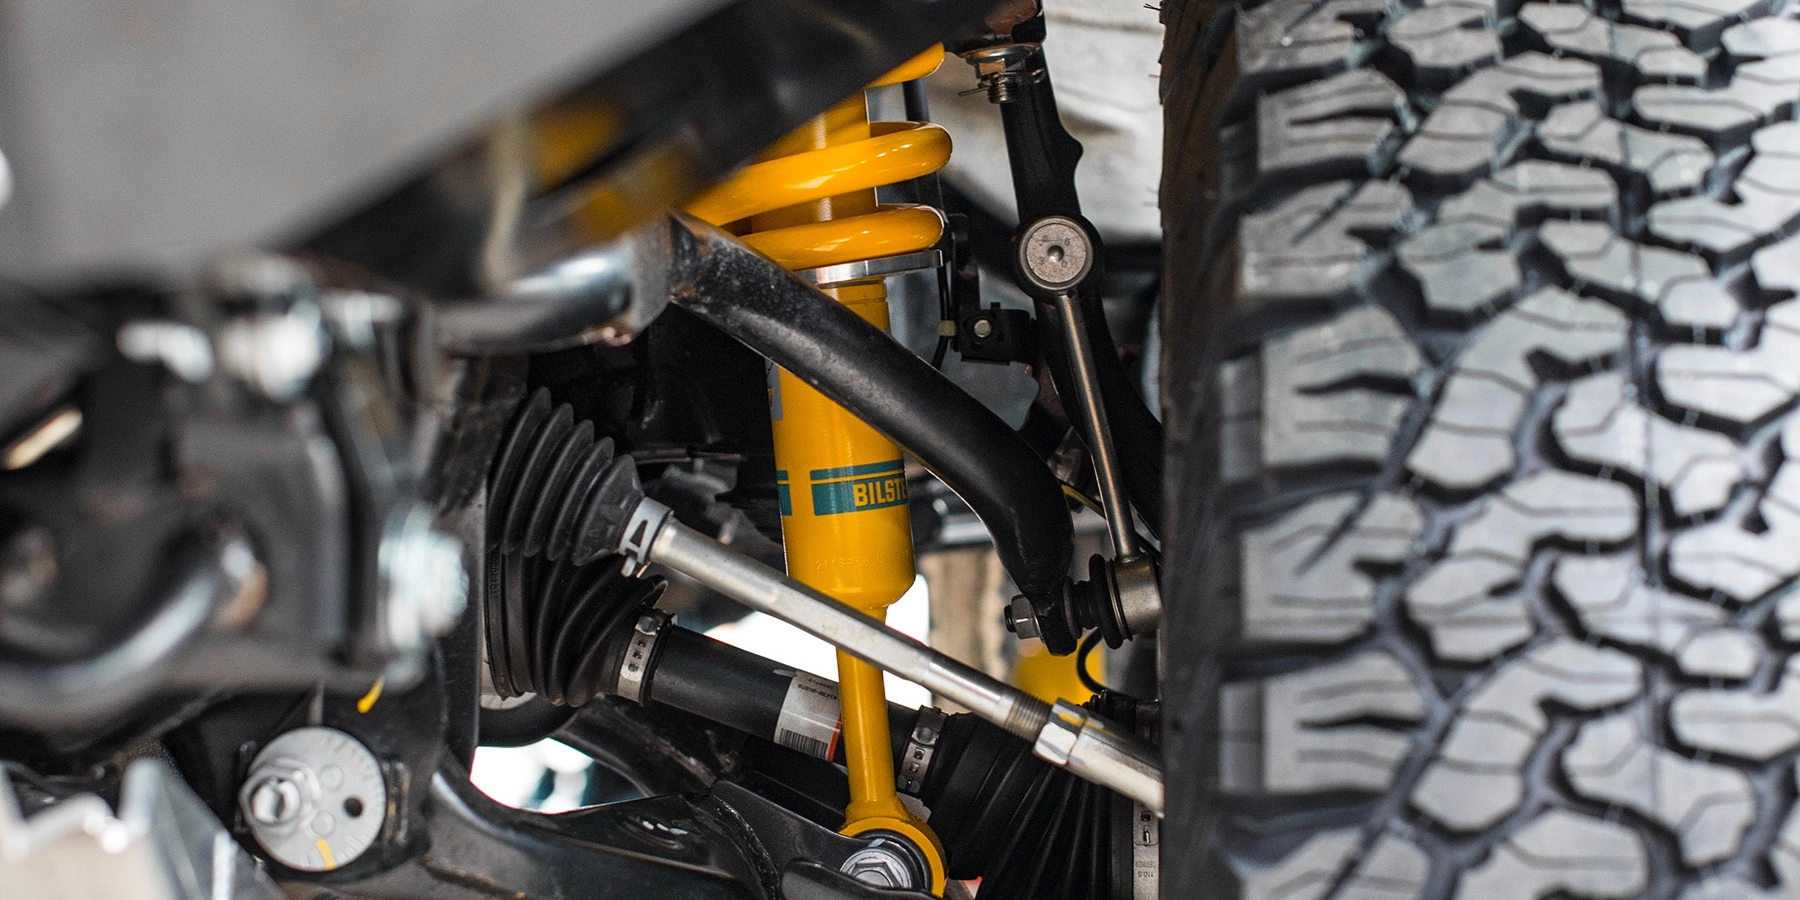
Choosing the wrong shock absorber for your 4WD build does not just cost money. It costs performance, comfort, and capability exactly where you need it most. If you have been researching Bilstein shocks B6 versus B8, you have probably already noticed that the conversation gets complicated fast, and most buyers assume one simply outranks the other on a product ladder. That assumption leads to mismatched setups and real-world disappointment.
The truth is more useful than that. Bilstein engineered the B6 and B8 for fundamentally different applications, and knowing which spec aligns with your intended use is the difference between a shock that works with your build and one that fights it. In this comparison, you will learn why these two series are not interchangeable, how each performs across real Australian 4WD use cases, where lift height becomes the deciding factor, and which spec deserves a place under your vehicle. Whether you run a dual-purpose daily driver or a lifted rig built for serious terrain, the right answer is already in the engineering. You just need to know where to look.
Why B6 and B8 Are Not a Step-Up Product Ladder
The most common mistake buyers make when researching Bilstein shocks is assuming a higher model number means a universally better product. That logic leads to mismatched builds and money spent on performance that actively works against the way the vehicle gets used.
Bilstein's own documentation draws a clear line. The B6 4600 is positioned as a direct-fit OEM-replacement upgrade for stock-height light trucks and SUVs, tuned to work within factory suspension geometry and standard spring rates. The B8 series targets vehicles already lifted, levelled, or fitted with sport springs, where altered geometry and higher spring rates demand different damping calibration. These are two distinct engineering briefs serving two different applications, not a progression from good to better.
Both share the same Bilstein monotube gas-pressure architecture, keeping oil and gas separated to deliver consistent damping and resist fade under load. The technology base is identical. What differs is how each unit is tuned, and for what suspension conditions it is calibrated.
That distinction has real consequences when ignored. Fitting B8 shocks to a stock-height dual-purpose 4WD produces damping rates that are too stiff for corrugated outback tracks and loaded touring. Running B6 shocks on a significantly lifted build with uprated springs results in underdamping, poor body control, and accelerated wear. Neither shock is more durable or better than the other; the correct choice depends entirely on ride height, spring rate, and intended use.
The smarter approach, one increasingly taken by experienced Australian 4WD buyers, is matching shock specification to the actual build rather than defaulting to the highest available model number. That is precisely the framework this guide is built around.
Bilstein B6 Shocks: Built for the Dual-Purpose Daily 4WD
The Bilstein B6 4600 is a direct-fit upgrade for stock-height and mildly lifted 4WDs, replacing OEM shock absorbers without requiring spring changes. It delivers noticeably better body control than worn factory units while keeping the ride liveable for daily use.
The key is the velocity-sensitive, digressive piston design. Under slow, low-force inputs, such as rock crawling or picking a line across uneven ground at walking pace, the B6 stays compliant and forgiving. Under fast, aggressive inputs, highway lane changes, sudden braking, or corrugated tracks at speed, it firms up progressively to suppress body movement. One shock, two distinct responses depending on what the situation demands.
For the majority of Australian 4WD suspension builds running 40mm to 50mm of lift with factory-style coils or leaf springs, the B6 sits squarely in its designed operating range. It is not simply tolerating a mild lift; it is matched to the spring rates and suspension geometry typical of that setup.
The ride character suits the dual-purpose owner well. Controlled enough to handle a loaded touring rig on a corrugated station track, compliant enough that the daily suburban commute does not become a chore. That balance is deliberate, not a compromise.
Performance does vary by platform. Tyre sidewall height, spring rate, and suspension geometry all influence how the B6 behaves on a specific vehicle. If you are weighing up whether the B6 is the right fit for your build before purchasing, the shock selection guide for 4WDs covers the key variables worth checking first.
Bilstein B8 Shocks: Engineered for Lifted and Sport-Tuned Setups
Where the B6 reaches its ceiling, the B8 takes over.
The Bilstein B8 series is not a single product but a purpose-built family: the 5100, 5100 Ride Height Adjustable, 6112, 8100, 8100 Bypass, and 8112 ZoneControl. Each variant is calibrated for vehicles already running a significant lift, lowering springs, or a sport suspension package. The common thread across all of them is stiffer damping, tuned specifically for the altered suspension geometry, higher spring rates, and elevated centre of gravity that lifted 4WD builds introduce.
That stiffness is a design decision, not a flaw. On a build running 75mm to 100mm or more of suspension travel, underdamped shocks produce wallowing through corners, excessive rebound off crests, and bottoming-out under load. The B8 provides the damping force to manage that extended travel range and keep the chassis composed under the spring rates that a serious lift demands.
The character that results suits specific use cases well: highway cruising, maintained gravel at pace, and sport-touring applications where body roll suppression and high-speed stability matter more than plush compliance over low-speed bumps. If your 4WD spends more time at 100 km/h on the Bruce Highway than it does crawling corrugated station tracks, the B8's priorities align with your driving.
That same firmness becomes a liability on an unmodified setup. Fitting Bilstein B8 shocks to a stock-height 4WD on standard springs is a common and costly mistake. The damping rates are mismatched to the available spring travel, producing a harsh, fatiguing ride with no handling benefit. If you are weighing up alternative shock platforms alongside Bilstein, the Koni suspension performance and quality guide is worth reading before committing.
Lift Height Compatibility: Which Spec Applies at Each Stage
Knowing which spec belongs at each lift stage removes the guesswork. Use the ranges below as a practical reference, but note the principle at the end before making your final call.
Stock height to 25mm (spacer lifts, OEM-style kits) The B6 4600 is the clear match. Bilstein engineers it specifically for stock-height light trucks and SUVs, pairing its digressive valving with factory geometry and standard spring rates. This is where it performs best.
40mm to 50mm (the most common Australian 4WD lift range) The B6 remains the right choice, provided the spring rates are not dramatically increased. Most 40–50mm builds using aftermarket coils or leaf packs at OEM-compatible rates sit squarely within the B6's design brief. This is its sweet spot in a 4WD context.
60mm to 75mm (medium-lift with uprated springs and modified geometry) This is the transition zone. Increased spring rates and altered suspension geometry demand higher damping forces than the B6 is calibrated to deliver. The B8 series begins to make engineering sense here, particularly where stiffer aftermarket spring packs are involved.
100mm+ (serious off-road builds, long-travel, high-clearance touring) The B8 series, including variants like the 5100 and adjustable options, is the appropriate specification. Running B6 shocks at this range produces underdamping, excessive body movement, and accelerated wear.
The principle that overrides the chart Lift height is a proxy, not the deciding factor. It is the spring rate and geometry change that dictates which shock belongs on the vehicle. A 60mm lift with mild springs can still suit a B6; a 50mm lift with heavily uprated springs may not. Before purchasing, cross-reference your spring rate against the shock's damping specification, and check your 4WD load rating and vehicle setup to confirm the full suspension picture.
Matching the Spec to Real Australian 4WD Use Cases
Lift height gives you the framework. Real-world use cases close the decision.
Daily driver with weekend fire trails, high country runs, or beach work: The B6 is the correct choice. Its digressive piston tuning stays compliant during suburban commuting and firms up progressively when inputs increase on rough terrain. It also handles the loaded weight of a packed 4WD without fade, which matters when you're carrying recovery gear, water, and camping kit.
Loaded touring rig on a 50mm lift, with canopy, drawers, and a rooftop tent: Pair the B6 with appropriately rated progressive-rate springs. The B8's stiffer damping works against low-speed articulation on corrugated outback tracks, creating a ride that fights the terrain rather than absorbing it. For this application, the B6 is not a compromise; it's the correct engineering match.
Towing a van or trailer regularly on a 40–50mm lift: The B6 handles tow-ball weight and rear squat well when matched to the right leaf spring rate. This sits squarely within its design brief for loaded light truck applications. No need to reach for a stiffer spec.
High-clearance or competition build on 75mm+ lift with heavy-duty springs: The B8 is the right call. At these spring rates and travel distances, the stiffer damping is necessary to prevent body float and shock fade at gravel speed.
Rock crawling and serious technical terrain: Neither the B6 nor the B8 is optimised for extreme articulation demands. Buyers with these requirements should look at Bilstein's ZoneControl variants or explore purpose-built options from brands like Tough Dog or Koni. The team at Suspension Megastore can help spec the right setup through the 4WD vehicle setup guide.
B6 vs B8 Side by Side: Key Differences at a Glance
The use cases above map clearly to application logic. This table consolidates that logic into a single reference.
| Bilstein B6 | Bilstein B8 | |
|---|---|---|
| Design intent | OEM-replacement upgrade for stock to mildly lifted 4WDs | Engineered for lifted, levelled, or sport-spring applications with altered geometry |
| Damping character | Velocity-sensitive digressive piston; compliant at low inputs, controlled at high inputs | Stiffer, more linear damping calibrated for higher spring rates and extended travel |
| Ride quality | Firm but liveable daily ride; noticeably better than worn OEM units | Less forgiving on corrugated roads; not optimised for low-speed comfort |
| Lift compatibility | 0 to 50mm with standard to mildly uprated springs | 60mm and above with significantly uprated springs and modified geometry |
| Construction | Monotube gas-pressure, 60+ year Bilstein heritage | Monotube gas-pressure, 60+ year Bilstein heritage |
The bottom row matters. Both specs share the same fundamental technology and build standard. The difference is tuning philosophy, not quality tier. Choosing B8 over B6 does not mean choosing a better shock; it means choosing a shock calibrated for a different suspension brief.
For a complete overview of both product lines, the full Bilstein shock range available at Suspension Megastore covers fitment options across popular Australian 4WD platforms.
Which Spec Is Right for Your Build: A Direct Recommendation
The comparison table above makes the spec boundaries clear. Here is how to apply them directly to your build.
Choose Bilstein B6 shocks if:
- Your 4WD runs stock height or a 40–50mm lift with factory-style or moderately uprated springs
- You use the vehicle as a genuine dual-purpose daily and off-road rig, covering suburban kilometres during the week and fire trails or corrugated tracks on weekends
- You want a direct performance upgrade over worn OEM shocks without altering your existing suspension setup
Choose Bilstein B8 shocks if:
- Your 4WD is running 60mm or more of lift with significantly uprated springs and modified suspension geometry
- Your primary use case prioritises high-speed body control over low-speed compliance, highway touring at 110 km/h rather than slow corrugated station tracks
If you are unsure exactly what lift height and spring combination your vehicle is currently running, measure suspension travel before purchasing. Fitting the wrong spec is an expensive mistake that neither the B6 nor the B8 can compensate for once installed.
Both Bilstein B6 and B8 shocks are available at Suspension Megastore, with fitment guidance specific to Australian 4WD platforms. If your build sits in the transition zone between specs, the product team can help you make the call based on your actual setup rather than guesswork.
The most important thing to take away: do not default to the B8 simply because it carries a higher model number. For the majority of Australian 4WD owners running standard to moderate lifts, the B6 will deliver better real-world performance in the conditions they actually drive in.
The Bottom Line on Bilstein B6 vs B8
The B6 and B8 are parallel tools built for different jobs. Treating them as a performance ladder leads directly to either overspending on stiffness you do not need, or underspeccing a lifted build that demands more damping force than the B6 is calibrated to deliver.
The rule of thumb is straightforward: stock height to 50mm lift with standard or mildly uprated springs points to the B6; 60mm and above with significantly uprated springs and modified geometry points to the B8.
Neither choice is a compromise. Both shocks are built on the same monotube gas-pressure platform that Bilstein pioneered over 60 years ago, keeping gas and oil separated to maintain consistent damping and resist fade under load. The difference between them is tuning philosophy matched to application, not a gap in materials, build quality, or engineering rigour.
If your application is straightforward, the guidance throughout this article gives you the answer. If your build sits in the transition zone between specs, or you are fitting Bilstein shocks to an Australian platform and want fitment-specific confirmation, the team at Suspension Megastore can help you match the right specification to your actual setup. Browse the full range of Bilstein B6 and Bilstein B8 shocks at Suspension Megastore, or get in touch directly for advice on your specific 4WD build.
Conclusion
Choosing between the Bilstein B6 and B8 comes down to one thing: matching the shock to your actual build, not a perceived performance ranking. The B6 delivers refined, capable damping for stock to 50mm lifted daily-driven 4WDs. The B8 is purpose-built for lifted, spring-uprated setups where greater damping force is genuinely required. Both specs share the same premium monotube construction and engineering pedigree, so neither choice means settling for less.
Get the spec right and you get a shock that performs exactly as Bilstein intended, on road and off it.
If you are ready to choose, browse the full Bilstein B6 and B8 range at Suspension Megastore. If your build sits between specs or you want fitment confirmation for your platform, contact the team directly. The right setup is closer than you think.
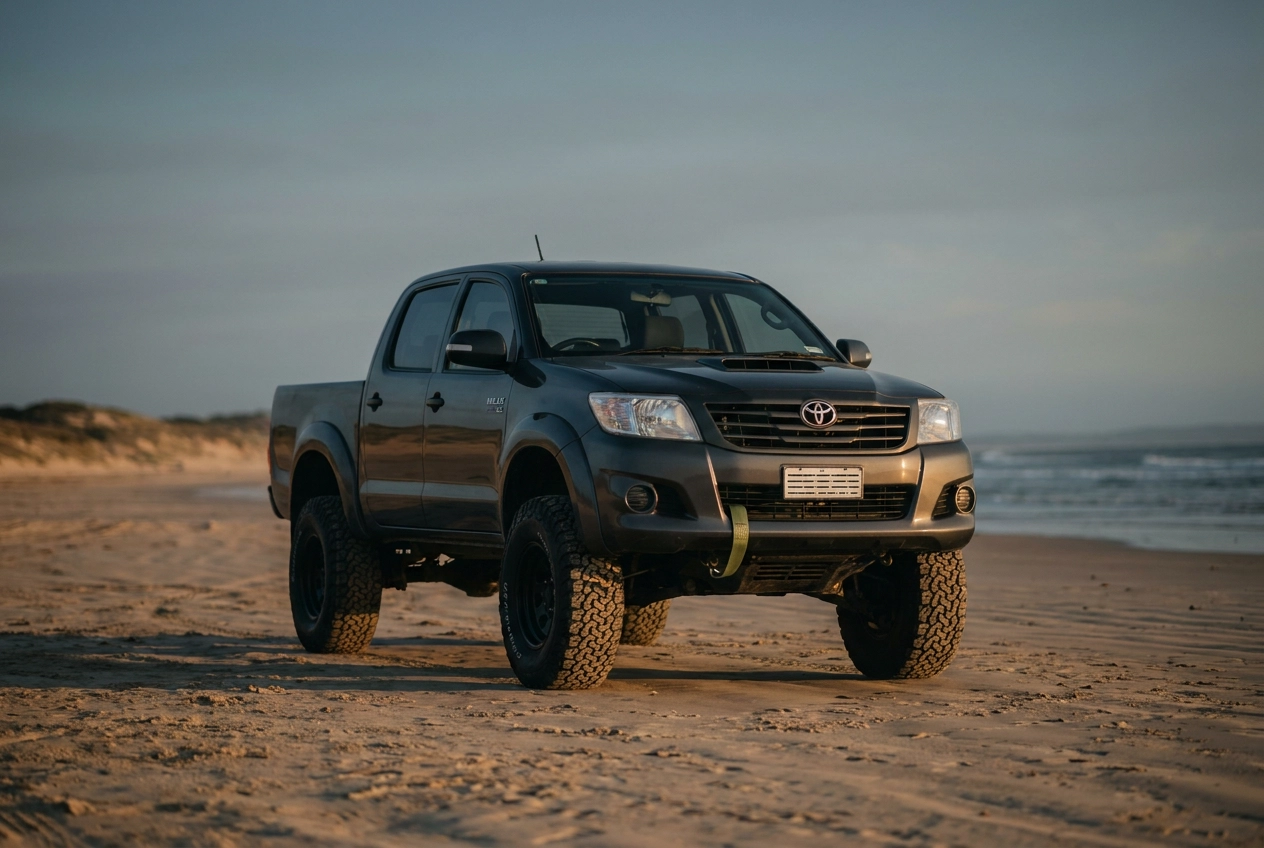
2-Inch vs 3-Inch Lift Kit: Which Height Is Right for Your 4WD Build?
More lift is not always better lift. It is a simple truth that gets lost the moment a 4WD owner starts scrolling through suspension catalogues, comparing lift heights without asking the more important question: what does this build actually need to do?
Choosing between a 2 inch suspension lift kit and a 3-inch kit is one of the most consequential decisions you will make for your vehicle. Get it right and you have a rig that performs exactly where you need it, stays legal on public roads, and does not cost you a second visit to a workshop. Get it wrong and you are either leaving capability on the table or navigating a compliance headache that adds cost and delays to your build.
This guide cuts through the noise. You will learn why lift height and ground clearance are not the same thing, what each height actually delivers in the real world, how tyre size reshapes the whole equation, and what Australian state laws require before your vehicle turns a wheel on a public road. By the end, you will have a clear framework for choosing the lift height that solves your specific problem.
Why Lift Height and Ground Clearance Are Not the Same Thing
Most buyers treat lift height as the primary measure of what a 4WD can clear. It is not. A 2-inch suspension lift kit raises the chassis approximately 50mm above factory height, but clearance beneath the differential housing on solid-axle 4WDs is governed primarily by tyre radius. The lift moves the chassis up; the tyre determines how much air exists between the ground and your lowest drivetrain component. These are two separate variables that compound each other, and they must be planned as a pair.
The practical consequence of confusing them is significant. A 3-inch lift kit does not deliver 50% more usable obstacle clearance than a 2-inch kit when both vehicles run identical tyres. The additional 25mm of chassis height matters, but the clearance beneath the diff, the transfer case, and the sump is still largely a function of how large the tyres are. Run the same rubber on both builds and the real-world clearance difference is marginal.
That changes the buying decision substantially. A 2-inch lift paired with a tyre upgrade from stock to a larger size can match or exceed the practical clearance of a 3-inch lift on factory-size rubber. The tyre diameter does more work than the extra 25mm of suspension travel in most real-world scenarios.
This matters beyond performance. Lift legality varies by state, and in many Australian states, 50mm is commonly cited as the suspension-only modification threshold above which engineering certification is required, confirm the current rule with your state transport authority before purchasing.
The Case for a 2-Inch Suspension Lift Kit
The 2-inch suspension lift kit is the most common suspension upgrade for Australian touring and daily-driven 4WDs, and the reason is practical rather than conservative. A 50mm lift delivers genuine improvements in clearance and load-carrying capacity while keeping steering geometry close enough to factory specification that most platforms do not require additional correction components. That keeps the total build cost lower and the installation straightforward.
Who it suits
The 2-inch lift is the right choice for owners who split their time between sealed highway kilometres and weekend tracks, run a roof tent, canopy, or drawer system, and need the vehicle to handle predictably at highway speeds. It is not a compromise option; it is a precision fit for the most common Australian 4WD use case.
Tyre fitment
At 50mm of lift, tyres in the 265/75R16 to 285/75R16 range are commonly reported to fit most popular platforms without rubbing or guard modification, confirm guard clearance for your specific vehicle before purchasing. That tyre window covers the majority of touring and light off-road requirements. If your build does not call for rubber beyond 285/75R16, a 2-inch lift gives you everything you need. Owners planning a more aggressive tyre upgrade or serious rock work should explore a higher-spec build configured for extreme off-road use before settling on lift height.
Compliance advantage
In many Australian states, 50mm is commonly cited as the suspension-only modification threshold above which engineering certification is required, confirm the current rule with your state transport authority before purchasing. For most owners who stay at or within this threshold, registration remains straightforward without additional inspection costs or paperwork.
Brand options
Tough Dog and Bilstein both produce well-developed 2-inch kits calibrated for the load weights common to Australian touring builds. Tough Dog offers platform-specific kits across both lift heights, with their touring kits well regarded on platforms like the LandCruiser 200 Series and Hilux; Bilstein's monotube damper technology suits owners who prioritise on-road ride quality alongside off-road capability.
The Case for a 3-Inch Lift Kit
Where the 2-inch lift reaches its ceiling, the 3-inch build begins. The 75mm of suspension travel opens fitment to larger tyre sizes in the 285/75R16 to 35-inch equivalent range, commonly reported across popular platforms, though confirm fitment for your specific vehicle, and that tyre size increase is where the real-world capability gain lives. Larger tyres change the approach angle, increase axle clearance over rocks and ruts, and make river crossings more forgiving. The lift creates the fitment space; the tyre delivers the performance.
This height suits builds that spend the majority of their time off sealed roads: remote touring rigs, heavily loaded dual-cabs running corrugated outback tracks, and competition-adjacent builds where articulation and obstacle clearance are primary design criteria. If the vehicle rarely leaves bitumen, the trade-offs at this height are hard to justify. If it regularly does, the extra 25mm over a 2-inch kit compounds meaningfully when paired with the right rubber.
Those trade-offs deserve honest assessment. At 75mm of lift, castor angle deviation, track-rod geometry, and driveline angles all move in ways that factory components may not fully absorb. On independent front suspension platforms in particular, aftermarket upper control arms with castor correction are not optional extras; they are necessary for safe steering behaviour and to prevent accelerated tyre wear.
This is why a 3-inch lift should be treated as a platform build decision, not a bolt-on upgrade. Extended control arms, alignment corrections, and in some cases a GVM upgrade are standard parts of a properly executed 75mm build. Sourcing a single-component lift at this height and fitting it without addressing geometry introduces risk that compounds over kilometres.
Both Tough Dog and Rancho offer 3-inch platform kits designed with correction hardware included on supported platforms, making them more complete starting points than assembling components individually, confirm platform availability before purchasing. If you have questions about which kit suits your specific vehicle and use case, the answers to common fitment questions are a useful reference before committing to a configuration.
How Tyre Size Changes the Equation for Both Lift Heights
The lift-tyre interaction established above has direct consequences for how you spec each height.
Practical tyre sizing by lift height:
- 50mm (2-inch) lifts: tyres in the 265/75R16 to 285/75R16 range are commonly reported to fit most popular platforms without rubbing, covering the majority of touring and daily-driver requirements, confirm guard clearance for your specific vehicle before purchasing
- 75mm (3-inch) lifts: fitment in the 285/75R16 to 315/70R17 range is commonly reported on supported platforms, confirm body and guard clearance specific to your vehicle before purchasing
These are general ranges. Exact fitment varies by vehicle model, so confirm platform-specific clearances before purchasing.
Wheel offset adds another layer of complexity. Wider tyres may require a revised offset or minor guard trimming regardless of lift height. That work costs money and should be factored into the total build budget upfront, not discovered post-installation.
Speedo correction is relevant at both lift heights once tyre diameter increases meaningfully from factory. An uncorrected speedo affects both compliance and practical accuracy, and is worth addressing as part of the tyre decision, not as an afterthought.
The most common mistake is treating tyre selection as secondary to lift height. Choose the lift first and the tyre second, and you risk either under-utilising the lift or creating clearance problems that demand further modifications. Tyre size and lift height are a co-decision; plan them together from the start.
State-by-State Compliance: What the Law Actually Says
Lift legality in Australia is not uniform, and the margin between compliant and non-compliant can be as little as 25mm. That gap matters when a 2-inch (50mm) lift clears the threshold without certification in most states, and a 3-inch (76mm) lift does not.
The 50mm threshold is the critical line across most of the country. In many Australian states, 50mm is commonly cited as the upper boundary for suspension-only modifications that do not require an engineering certificate, confirm the current rule with your state transport authority before purchasing. In NSW, the Light Vehicle Modifications Manual confirms that significant modifications require compliance certification from a licensed certifier under the Vehicle Safety Compliance Certification Scheme; body lifts and combined lift totals are assessed separately and under stricter rules than suspension-only changes.
Victoria and Western Australia follow comparable thresholds but diverge on the detail. Whether a body lift counts toward the combined total, and what documentary evidence a certifier requires, differs between those states. Never assume one state's rules apply in another.
A 3-inch lift will require engineering sign-off in most Australian states. That process typically costs in the hundreds to low thousands of dollars depending on state and certifier, obtain quotes from your state's licensed certifiers before budgeting. It requires a vehicle inspection before re-registration, and places an ongoing obligation on the owner to maintain the vehicle to the certified specification. Modifications made after certification that fall outside the approved scope can void it entirely.
Regulatory thresholds are also subject to revision. Confirm current requirements directly with your state's transport authority before purchasing. If you are uncertain which rules apply to your specific build, contact Suspension Megastore Australia for guidance before committing to a lift height.
The legal risk of running an uncertified 3-inch lift is financial, not just administrative. Defect notices, fines, and failed roadworthy inspections are the immediate exposure. The longer-term risk is insurance: an at-fault accident in a non-compliant vehicle gives an insurer grounds to reject the claim. That is a concrete liability, not a theoretical one.
Suspension Geometry and On-Road Handling: What Changes at Each Height
Compliance requirements tell you what lift is legal. Geometry tells you what lift is safe to drive every day.
At 50mm, most IFS platforms require only a standard four-wheel alignment to restore handling behaviour. Steering return-to-centre remains predictable, and tyre wear follows a normal pattern. This is why a properly installed 2-inch kit typically needs nothing more than that alignment to get back to factory handling behaviour.
At 75mm, most IFS platforms will benefit from, and many will require, aftermarket upper control arms with castor correction; consult your installer or the kit manufacturer's fitment guide for your specific vehicle. Without them, owners experience vague on-centre steering feel and uneven tyre wear that compounds over time. If the cost estimate in your 3-inch build budget does not include correction arms, recalculate.
A higher centre of gravity is the other on-road consequence. A 3-inch lift raises the CofG measurably, increasing body roll through corners and altering weight transfer under braking. These effects are manageable, but drivers coming from a standard-height vehicle need a deliberate adjustment period, particularly when the vehicle is loaded for touring.
On live-axle and dual-cardan shaft vehicles, driveline angle is a serious concern at 75mm. Excessive universal joint operating angles accelerate wear and introduce vibration under load, especially on-highway at speed. This is a known failure mode on popular platforms when lifts are installed without addressing driveline geometry.
ABS calibration does not change with lift height, but a higher CofG and shifted weight distribution mean stability control interventions can occur earlier and feel more intrusive, particularly in a fully loaded touring configuration. This is not a defect; it is the system responding accurately to changed dynamics.
Shock specification matters independently of lift height. A 2-inch lift on well-tuned street and performance-grade dampers matched to the vehicle's weight, such as Bilstein or Koni units, will ride noticeably better than a 3-inch kit built around generic monotube shocks. Height alone does not determine ride quality; damper calibration does.
Which Brands Perform Best at 2-Inch vs 3-Inch
Choosing the right shock absorber and spring combination matters as much as choosing the right lift height. Each brand in this segment has a distinct engineering philosophy, and matching that to your use case is how you avoid spending money twice.
Tough Dog offers platform-specific kits across both lift heights. Their 2-inch touring kits are particularly well-regarded on the LandCruiser 200 Series and Hilux, where load-carrying performance and durability over long distances are the primary demands. If you are building a workhorse tourer and want proven fitment data behind the kit, Tough Dog is a logical starting point.
Bilstein's monotube shock technology suits owners who want on-road ride quality without sacrificing off-road competence. Their 2-inch kits maintain damping characteristics closer to OEM spec than most alternatives, which makes them the stronger choice for 4WDs that spend the majority of kilometres on sealed roads.
Koni's adjustable damper range addresses a specific real-world problem: the same vehicle that runs unladen on weekdays often carries a full touring load on weekends. Koni's adjustable range is designed to let owners tune damping to match load conditions, rather than accepting a fixed compromise, which has clear practical value in mixed-use builds.
Rancho's RS9000XL series brings nine-position adjustability to 3-inch-capable configurations on supported platforms, confirm platform availability before purchasing. For owners whose build will evolve over time, a kit that adapts to each stage is more cost-effective than replacing components when the build changes direction.
No single brand is the correct answer across all vehicles and use cases. The decision turns on your specific platform, intended tyre size, and how the vehicle is actually used day to day. Suspension Megastore's news and guides section covers platform-specific fitment topics, and the team can confirm which brand and configuration suits your vehicle before you purchase.
GVM Upgrades: A Legitimate Pathway for 3-Inch Compliance
Brand selection resolves one question; compliance resolves another. For owners pursuing a 3-inch lift, a GVM upgrade is a pathway that most buying guides overlook entirely.
A Gross Vehicle Mass upgrade is a certified engineering modification that formally increases a vehicle's legal payload capacity. Critically, the suspension upgrade required to achieve that higher GVM rating is assessed and certified as part of the same package. That means a 3-inch lift can be incorporated into the certification rather than requiring a separate engineering sign-off for the suspension alone.
What the GVM process actually involves
An independent engineer assesses the vehicle as a system. Suspension, brakes, and tyres are evaluated together, not in isolation. The result is a certified configuration that is fully road-legal and insurable, which is the outcome that matters when a claim is on the table.
Not every vehicle qualifies
Eligibility is limited. The pathway is most commonly applied to dual-cab utes and larger SUVs used for commercial work or heavy touring: HiLux, Ranger, and LandCruiser 79 Series are among the most frequent candidates. Lighter passenger-derived 4WDs and some older platforms either fall outside manufacturer-approved GVM upgrade programs or cannot meet the engineering criteria required.
Budget accordingly
The engineering and compliance process sits outside the suspension kit cost. Owners should budget often in the range of several thousand dollars on top of the suspension kit cost for the GVM upgrade process itself, obtain quotes from certified engineering firms in your state for an accurate figure. This is not a cheap shortcut; it is a comprehensive legal solution that costs accordingly.
If a 3-inch lift has been dismissed purely on certification grounds, the GVM pathway deserves a proper assessment before that decision is finalised.
Total Cost Comparison: 2-Inch vs 3-Inch Across Real Build Scenarios
With those compliance and GVM costs now mapped out, it is worth putting the numbers side by side across three realistic build scenarios.
Scenario 1: Daily driver with weekend touring (2-inch lift) Suspension kit: $800 to $2,000 depending on brand. Tyre upgrade to a commonly fitted touring size: budget varies by tyre brand and retailer. No certification required in most states. Total installed cost: approximately $1,400 to $3,000.
Scenario 2: Serious off-road and remote touring build (3-inch lift) Suspension kit: $1,500 to $3,500. Larger touring tyres: budget varies significantly by brand, size, and retailer. Upper control arms or castor correction hardware: budget varies by platform and brand. Engineering certification: typically in the hundreds to low thousands of dollars depending on state and certifier, obtain quotes from your state's licensed certifiers before budgeting. Total installed cost varies substantially; obtain itemised quotes before committing. Browsing load-rated suspension components before committing helps avoid under-speccing correction hardware at this height.
Scenario 3: Loaded touring with GVM upgrade and 3-inch lift All Scenario 2 costs apply, plus the GVM upgrade process. Total installed cost for a fully certified, capable platform build is substantially higher than a 2-inch build.
The total cost gap between a basic 2-inch build and a fully certified 3-inch platform build is substantial, often two to three times the outlay, making lift height one of the most consequential budget decisions in any 4WD build.
How to Choose the Right Lift Height for Your Specific Build
Those cost scenarios make the financial case. What follows is a practical decision filter you can apply before you buy.
Start with your actual weekly use pattern. If the vehicle is on sealed road five or more days a week with occasional weekend tracks, a 2-inch lift paired with a tyre upgrade to a commonly fitted size in the 265/75R16 to 285/75R16 range, commonly reported to suit most popular platforms; confirm for your specific vehicle, resolves clearance and load-carrying needs without triggering certification requirements in most states. That is the right answer for the majority of Australian 4WD owners.
If serious off-road use is the genuine purpose, treat a 3-inch lift as a full platform build from the outset. Tyres larger than the 285/75R16 range, significant added payload, or regular technical terrain justify the height; but upper control arms, castor correction, and engineering sign-off are not optional additions at that specification. They are core requirements for a safe and road-legal vehicle. Review your 4WD load ratings and vehicle setup before finalising any lift and tyre combination.
Check your state's regulations before committing to a height. In many Australian states, 50mm is commonly cited as the suspension-only modification threshold above which engineering certification is required, confirm the current rule with your state transport authority before purchasing, as thresholds are subject to revision.
Match the brand to the build purpose. Bilstein and Koni are the stronger choice for daily-driver applications where on-road ride quality and damper adjustability matter most. Tough Dog and Rancho are better suited to heavier-use and dedicated off-road platforms at either lift height.
When genuinely uncertain, spec the 2-inch first. It is faster to install, cheaper overall, and keeps registration straightforward. Most owners who build to a 2-inch 4x4 suspension lift specification never find a genuine use-case reason to go higher.
The Right Lift Is the One That Solves Your Actual Problem
The decision comes down to one question: what problem does the lift actually need to solve?
For most Australian 4WD owners, a 2-inch suspension lift kit paired with a tyre upgrade answers that question completely. It is legal without certification in most states, preserves factory-adjacent geometry, and delivers genuine capability for touring, loaded weekend use, and moderate off-road terrain. The majority of owners who build to this spec never encounter a situation where more height would have made a measurable difference.
A 3-inch lift is the right answer for dedicated off-road and remote touring builds where larger tyres, greater articulation, and technical terrain are regular realities. But it only works as a full platform build, with the geometry correction, certification, and matched tyres that entails.
The most common buying mistake is treating lift height as a proxy for capability, when the lift-tyre pairing and the quality of the build determine the outcome far more than the height number alone.
Suspension Megastore stocks 2-inch and 3-inch lift kits from Tough Dog, Bilstein, Koni, and Rancho, with vehicle-specific fitment guidance available before purchase. If you are not certain which height suits your build, that is the right conversation to have before you order, not after the kit arrives.
Conclusion
Before you order, get the fitment conversation right. Suspension Megastore carries Tough Dog, Bilstein, Koni, and Rancho kits with vehicle-specific guidance built into the process. Browse the range, use the fitment tools, or speak directly with the team. The best 4WD build starts with the right decision, not just the biggest number.
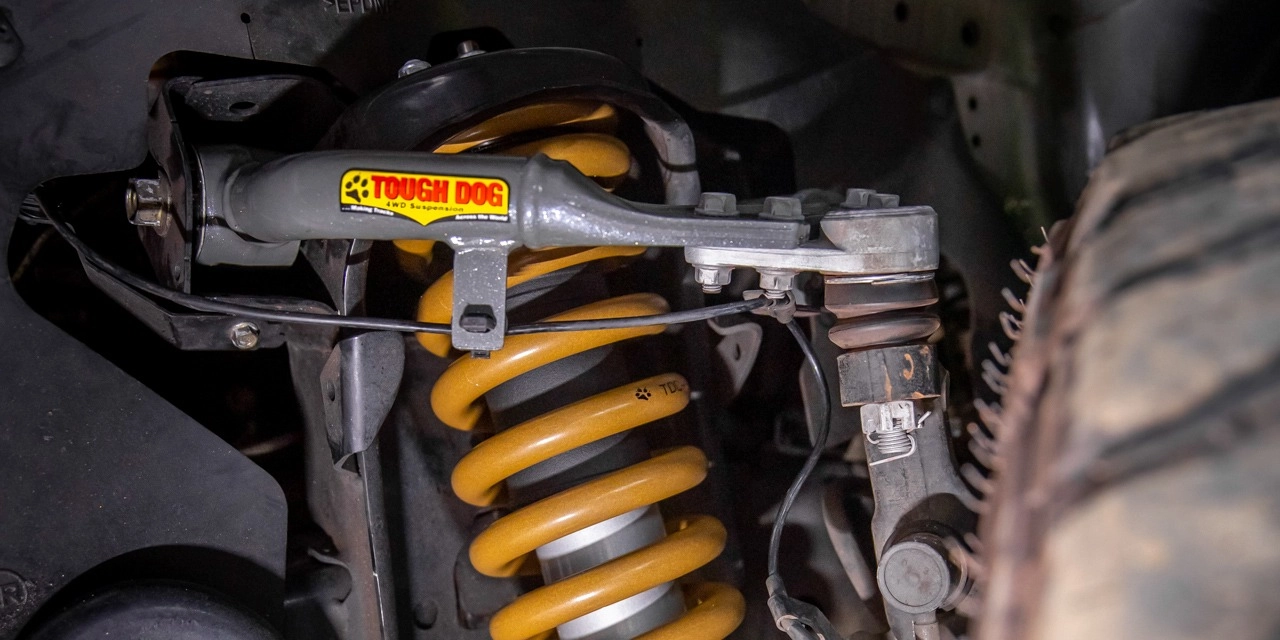
Upper Control Arms and 4WD Lift Kits: Why Your UCAs Matter More Than the Kit Price
Most 4WD owners shopping for a lift kit focus on one number: the price. A few hundred dollars saved on the kit itself feels like a win, right up until the vibration starts, the CV joints begin clicking, and the workshop bill lands. What changed between the purchase and the problem is geometry, and the component sitting at the centre of that geometry is the upper control arms.
Lifting a 4WD beyond approximately two inches without addressing suspension geometry does not just alter ride height. It forces the CV axle to operate outside its designed angle, placing stress on joints that were engineered for stock ride height. From that point, accelerated wear is not a possibility; it is a certainty.
This post works through exactly why upper control arms matter so much in a lifted build. You will learn what UCAs actually do structurally, what happens to your driveline past the two-inch threshold, why factory arms are not designed for lifted geometry, and how to spec a complete build that performs correctly from day one. If you are planning a lift or already running one, this is worth understanding before your next kilometre.
What Upper Control Arms Actually Do in Your 4WD Suspension
Upper control arms are structural pivot links connecting the front hub and wheel assembly to the chassis. They are not trim or comfort components, they are load-bearing geometry components that every other part of your 4WD suspension system depends on to function as designed.
At stock ride height, factory UCAs hold the CV axle within a precise angular operating range. That range is deliberately narrow, engineered to minimise stress on the CV joint bearings and races across the full sweep of suspension travel. Step outside it and wear begins immediately.
UCAs also govern caster angle, the rearward tilt of the steering axis that gives a vehicle its straight-line stability and steering return-to-centre behaviour. This means UCA geometry shapes how your 4WD drives on bitumen just as much as how it handles on the trail.
Front upper control arms do not work in isolation. They form the upper leg of the suspension geometry triangle, working in tandem with the lower control arms and the strut or coilover. Alter one side of that triangle without accounting for the others and the whole system shifts. The geometry interdependency is why a lift kit cannot be evaluated as a single component in isolation, it is a system change that affects every point in the triangle simultaneously.
Because the UCA sets the position of the upper ball joint, it determines the arc the steering knuckle travels through during suspension articulation. At stock height, that arc aligns with the CV axle's design tolerances. The moment ride height changes, that alignment is no longer guaranteed, which is precisely why UCA geometry becomes the critical variable in any suspension lift build.
What Happens to CV Joint Angle Beyond the 2-Inch Lift Threshold
Factory suspension geometry holds only at the ride height it was designed for.
Once a 4WD suspension lift exceeds approximately 2 inches, the CV axle is forced to operate at a steeper angle than its internal components were built to tolerate. At that steepened angle, the joint generates excess heat, loads the internal bearings and races unevenly, and introduces vibration under load. None of this is dramatic or sudden. It is quiet, continuous, and cumulative.
The mechanical reason is straightforward. Factory upper control arms stay fixed at their original arc when a lift is installed. The lower suspension components drop with the added ride height, but the upper ball joint does not rise to compensate. The result is an angular mismatch across the entire front end, one the OEM never designed for and the CV joint was never rated to handle indefinitely.
The mechanical logic is direct: a joint operating continuously outside its designed angle range accumulates stress with every kilometre, making progressive wear inevitable rather than conditional.
Off-road driving compounds the problem significantly. Full suspension droop during articulation pushes the already-steep CV angle closer to its mechanical limit with every cycle. The more the suspension travels, the faster the wear accumulates.
Lift height is the primary variable, but it is not the only one. Vehicles used for towing, load carrying, or extended touring place higher sustained loads through the driveline and reach the failure threshold faster than a lightly used weekend vehicle. If you have questions about how lift height and driveline components interact for your specific build, confirming the right component combination before you order is always the better starting point.
Why Factory UCAs Were Not Built for Lifted Suspension Geometry
The wear problem starts with the CV angle, but it does not stop there.
OEM upper control arms are engineered for a single ride height; lift beyond that envelope and every tolerance shifts. The arm is not broken; it is operating outside the conditions it was designed for.
The consequences extend beyond the CV joint. When a factory UCA is stretched beyond its design envelope, the lower ball joint absorbs load at angles it was never rated to carry. That accelerates wear at a second critical point in the front 4WD suspension components chain, one that often goes unnoticed until damage is already significant.
OEM bushings compound the problem. They are selected for noise, vibration, and harshness isolation at stock geometry. Under the altered load paths created by a 4WD suspension lift, those bushings deform differently, wear faster, and introduce compliance the OEM never validated. The degradation is cumulative.
Some factory UCA designs face a harder limit: they physically cannot be adjusted to correct geometry at two-plus inch lifts. No alignment tweak resolves it. Replacement is the only option.
Staying within designed ride-height tolerances, or restoring correct geometry with aftermarket UCAs when lifting further, is what separates a suspension system that works from one that degrades from day one.
The Real Cost of Skipping UCAs in a 4WD Lift Build
The cascade of component stress described above carries a direct financial consequence that most buyers only discover after the build is done.
CV joint replacement, once labour, parts, and any recovery costs are factored in, can run well into the thousands of dollars per axle for a 4WD in Australia. That figure dwarfs the price difference between a lift kit that includes upper control arms and one that does not. The maths is not complicated; the timing of when buyers do it usually is.
The cost rarely stops at the repair itself. CV joint failure in a lifted 4WD seldom provides enough warning to avoid a breakdown. For a vehicle used on remote Australian tracks, that means a recovery call, a ruined trip, and potentially a genuine safety situation if the failure occurs far from mobile coverage. Roadside assistance does not make the geometry problem go away.
Ball joint wear adds a second repair line to the tally, a consequence of the same geometry problem covered earlier. Unlike CV noise, ball joint wear under incorrect geometry is a serious safety concern, not a drivability inconvenience.
The upfront investment in correct front upper control arms as part of the initial 4WD lift kit build is substantially less than the cost of a single unplanned driveline repair, making them the highest-return line item in the entire suspension budget.
What Aftermarket Upper Control Arms Actually Correct
So the cost case for aftermarket UCAs is clear. The next question is what they actually fix, mechanically.
Quality aftermarket front upper control arms address the root cause directly: revised pivot geometry that repositions the upper ball joint at the correct arc for the lifted ride height. That single correction restores CV axle operating angles to within the manufacturer-intended range, eliminating the stress that drives premature wear.
The primary mechanism is increased arm length. By extending the arm relative to factory, the ball joint moves outward and upward, compensating for the change in ride height and recentring the CV angle. CV joints operate optimally between 10 and 12 degrees, and aftermarket UCA geometry is engineered to keep operation within that range at the lifted height, not the stock one.
Caster correction is built into many aftermarket UCA designs as well. Lifting a 4WD reduces forward caster angle, which degrades straight-line stability and dulls steering feel noticeably on road. Aftermarket UCAs with caster correction address this secondary problem alongside the CV angle fix, so the vehicle drives properly, not just survives the lift.
Material upgrades matter too. Quality aftermarket UCAs commonly replace factory rubber bushings with polyurethane or spherical bearings better suited to the altered load paths of a lifted 4WD, though specific bushing type should be confirmed against each product's specification.
Suspension Megastore's range includes geometry-corrected lift components from Tough Dog and Bilstein, designed to be paired with compatible UCAs for a complete build.
How to Spec Front Upper Control Arms With Your 4WD Lift Kit
Knowing what aftermarket UCAs correct is one thing; selecting the right arms for your specific build is another.
Start with lift height. Arms engineered for a 2-inch lift use different pivot geometry to those designed for a 3-inch lift. Fitting the wrong spec undermines the correction entirely, so confirm your intended lift height before you look at anything else.
Verify platform and year compatibility. Minor production changes between model years can alter upper ball joint dimensions, mounting point locations, and bush specifications. A UCA listed for your model may not fit your build year without modification, so check compatibility against your VIN or build date, not just the model name.
Match bushing type to your intended use. Polyurethane bushes suit mixed road and trail use well, offering good compliance and long service life. Spherical bearings deliver sharper off-road precision but introduce slightly more NVH on bitumen. Neither is universally better; the right choice depends on how and where you drive. If your 4WD carries heavy touring loads, the 4WD load ratings and vehicle setup guide is worth reviewing before finalising your spec.
Budget for UCAs upfront. Adding them after the lift is already installed means a second wheel alignment and potentially a second labour charge for disassembly. Including them in the initial build costs less and produces a better result.
Confirm the full component list before ordering. Lift height, UCA spec, and alignment settings interact directly, and getting one wrong affects all three. The product support team at Suspension Megastore can work through your specific vehicle, lift height, and use case before you commit. For further guidance on suspension builds, the Suspension Megastore news and advice hub covers a range of 4WD suspension topics worth bookmarking.
Signs Your Current 4WD Lift May Need UCA Correction
If your 4WD has already been lifted and you skipped the UCA correction, these are the warning signs that the geometry problem is catching up with you.
Persistent highway vibration through the steering wheel or floor that survives wheel balancing and tyre rotation is a strong indicator of CV angle stress. The vibration is caused by the joint operating outside its designed angle range, not by tyre imbalance, so no amount of balancing will fix it.
Uneven front tyre wear, particularly along the inner or outer edge, points to alignment and geometry that has shifted post-lift. Uncorrected upper control arm position alters camber and caster in ways that standard alignment adjustments cannot fully compensate for on stock UCAs.
Clicking or clunking from the front end at low speed, especially on full steering lock, means the CV joint has moved past early wear and is physically failing. A clicking CV under load is not a symptom to monitor; it is a component approaching the end of its serviceable life.
Reduced steering feel, highway wander, or a steering wheel that does not return cleanly to centre are signs of reduced caster angle, a direct consequence of lifting without correcting front upper control arm geometry. This affects on-road confidence and is not resolved by wheel alignment alone.
If a workshop has already flagged CV or ball joint wear on your lifted 4WD, replacing the parts without correcting the geometry is a short-term fix. The same wear mechanism will repeat on the new components. The correct response is to fit aftermarket UCAs as part of the repair, not after it.
Build It Right the First Time
The fix for any of those symptoms is the same: correct the geometry, not just the parts.
Beyond a 2-inch lift, upper control arms are not optional. They are the component that makes every other part of the kit function as it was designed to. Without them, the lift height is there but the geometry is not, and the rest of the build works against itself from day one.
As detailed above, a single unplanned driveline repair costs far more than UCAs included upfront.
A complete, correctly-specced build done once is cheaper, safer, and more capable than a cheaper build corrected twice. That is not a caveat. It is the most reliable financial pattern in the 4WD suspension market.
Suspension Megastore stocks lift solutions from Tough Dog, Bilstein, Koni, and Rancho, alongside compatible UCAs to suit each platform. The team can confirm the right spec for your vehicle, lift height, and intended use before you order, so the build is complete from the outset rather than incomplete by default.
Get the geometry right the first time. Everything else follows from that.
Conclusion
Upper control arms are not an upgrade. They are a requirement for any lift beyond two inches that expects to function correctly, last, and stay safe on and off the road.
The key points are clear: factory UCAs are engineered for stock ride height; CV joint angles become destructive past the 2-inch threshold without correction; skipping UCAs turns a budget build into an expensive repair cycle; and aftermarket UCAs are the component that makes the rest of the kit perform as intended.
If you are planning a lift build or suspect your current setup has geometry issues, speak with the Suspensionmegastore team before you order. Get the right components confirmed for your platform, your lift height, and your use case. Build it once. Build it right.